How to Generate Beautiful Images with AI
Published on April 9, 2026
You've tried an AI image generator — GPT-Image, Nano Banana, Flux or Stable Diffusion — and the results disappointed you? Blurry images, weird compositions, generic style… Most of the time, the problem isn't the tool: it's the prompt. A prompt is the text description you give the AI to create your image. And contrary to what many people think, it's not just a simple sentence — it's a structured visual instruction.
The good news: writing a great image prompt is a learnable skill. You don't need to be an artist or an engineer. With a few concrete techniques, you'll go from unpredictable results to images that truly match your vision.
In this guide, you'll learn how to structure a prompt, choose the right artistic style, control composition, manage rendering quality, and iterate effectively. Each section includes comparative examples you can copy and adapt immediately.
At a glance — the 7 pillars of a great image prompt
| # | Pillar | What it changes |
|---|---|---|
| 1 | Prompt structure | The essential foundation for any controlled result |
| 2 | Artistic style | Defines the visual identity of your image |
| 3 | Quality and rendering | Takes you from draft to professional image |
| 4 | Composition | Frame, angle, depth — like a real photographer |
| 5 | Text in images | Avoid common mistakes |
| 6 | Iteration | How to refine until you get the perfect result |
| 7 | Advanced tips | Shortcuts to save time |
Prompt Structure
Why structure changes everything
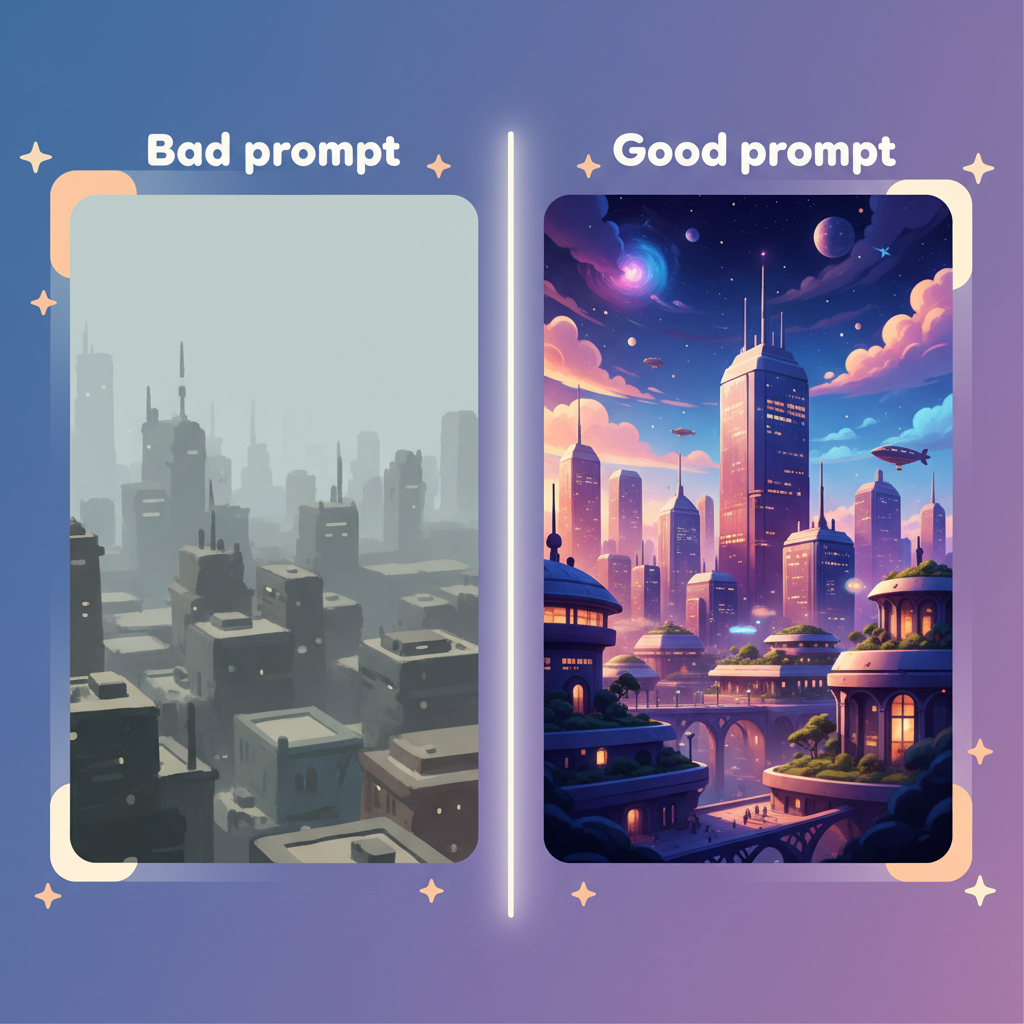
An image generation model doesn't "think" — it translates words into pixels based on billions of learned associations. If your prompt is vague, it fills in the gaps randomly. Random can be interesting for free artistic exploration. But if you have a precise vision in mind, every piece of information you leave out is a chance of ending up with something unexpected.
The golden rule: everything that isn't written is invented by the model.
An effective, complete prompt rests on six components. They chain together naturally, like describing a scene to a film director:
| Component | Definition | Example |
|---|---|---|
| Main subject | The core concept of the image | a futuristic city, portrait of a woman |
| Details / Action | Pose, expression, clothing, movement | wearing a red coat, looking away, running through rain |
| Context / Environment | Location, era, weather, atmosphere | in a Japanese garden at dusk, cyberpunk street at night |
| Artistic style | Photo, illustration, 3D, painting… | flat design illustration, oil painting, anime style |
| Quality / Rendering | Level of detail, lighting, resolution | ultra realistic, 8k, cinematic lighting |
| Composition | Angle, framing, depth of field | close-up portrait, rule of thirds, shallow depth of field |
Example of a prompt built with this structure:
❌
a woman in a city✅
Portrait of a young woman with short dark hair, wearing a vintage leather jacket, standing on a rainy Tokyo street at night, surrounded by neon reflections. Cinematic photography style, 35mm film grain, dramatic lighting, shallow depth of field, ultra realistic, 8k.
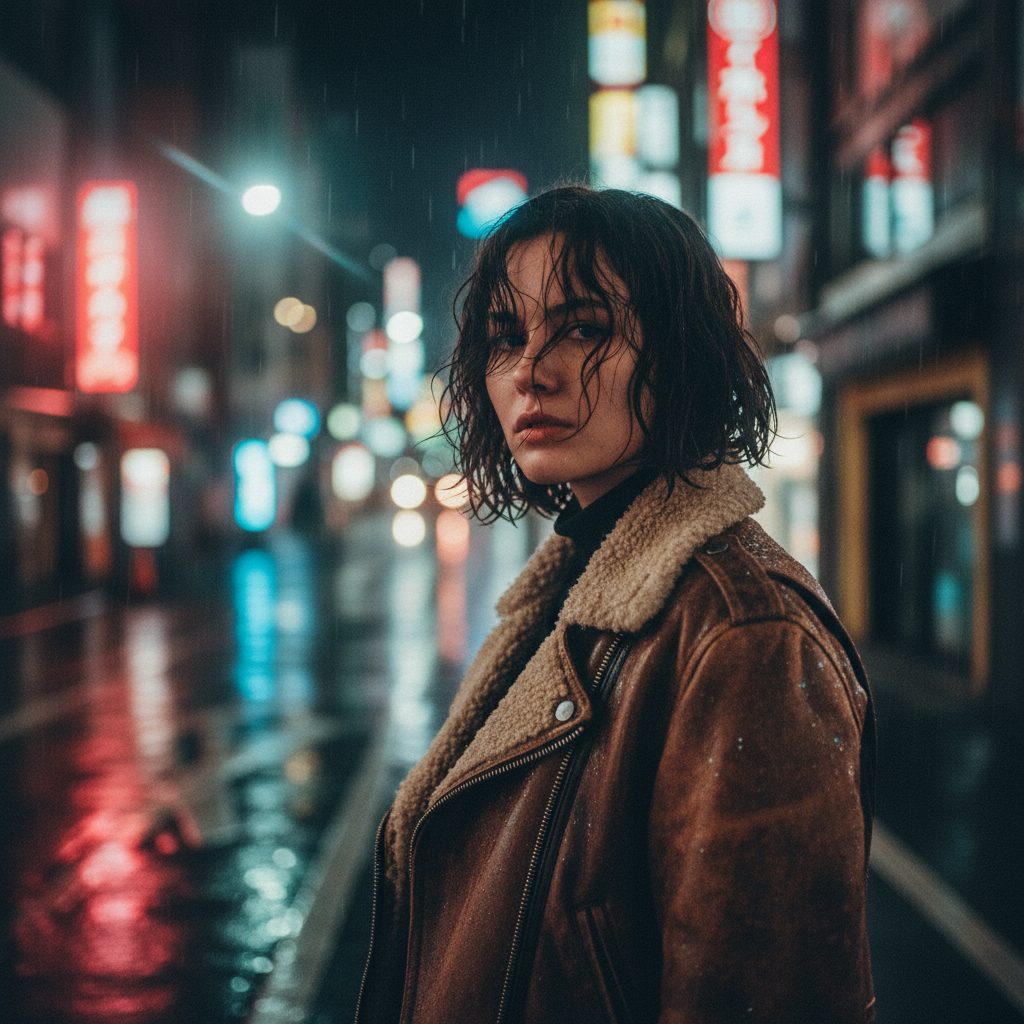
The difference in results between these two prompts is spectacular — even though the basic information is the same.
Order of elements
Always start with the main subject. Elements at the beginning of a prompt carry more weight in most models. Put what matters most first.
Artistic Style
Style is the visual identity of your image
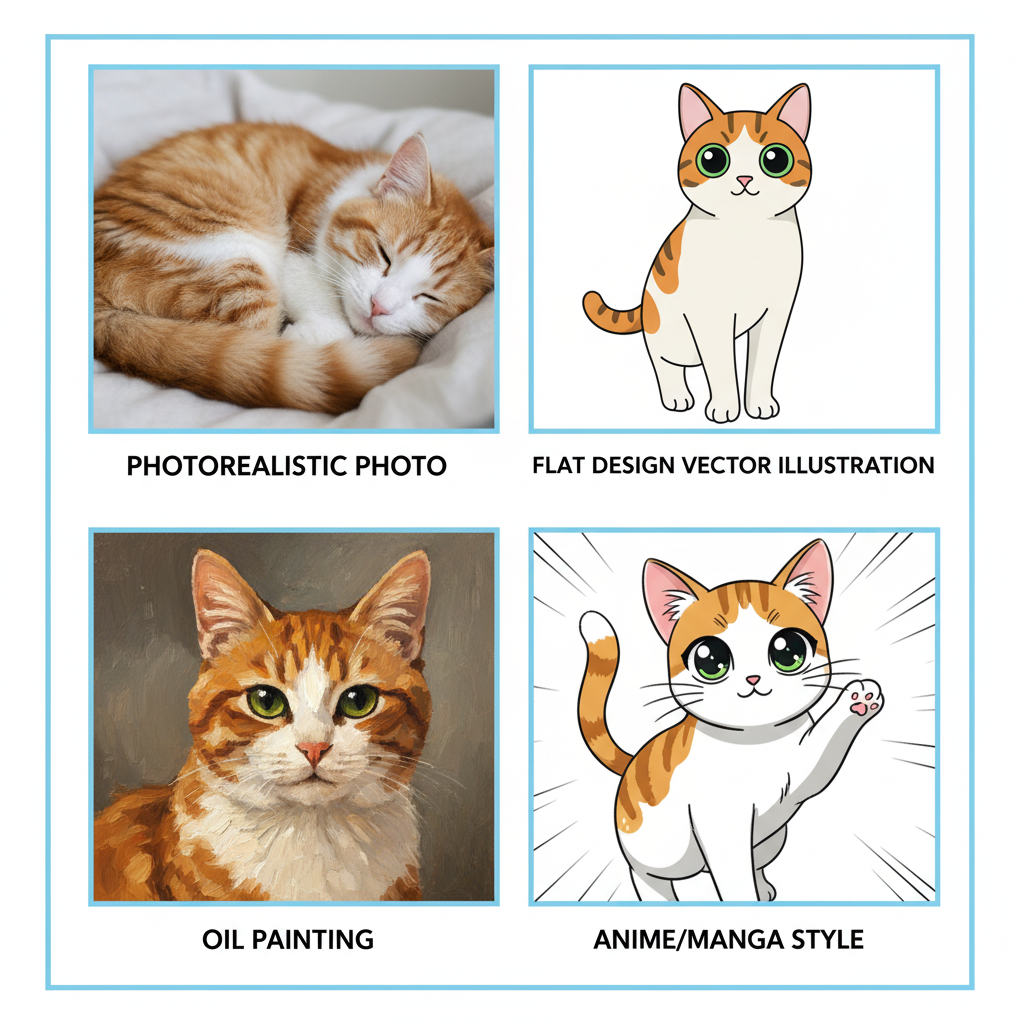
Two images with the same subject but different styles have nothing in common. An AI can generate "a cat" as a watercolor illustration, a hyperrealistic photo, a 3D Pixar render, or a manga drawing — and each result will be radically different. Specifying the style is therefore just as important as describing the subject.
There are four main ways to define an artistic style:
1. By referencing an artist or artistic movement
This method is often the most effective because models have been trained on enormous corpuses of artwork.
| Style requested | Effect |
|---|---|
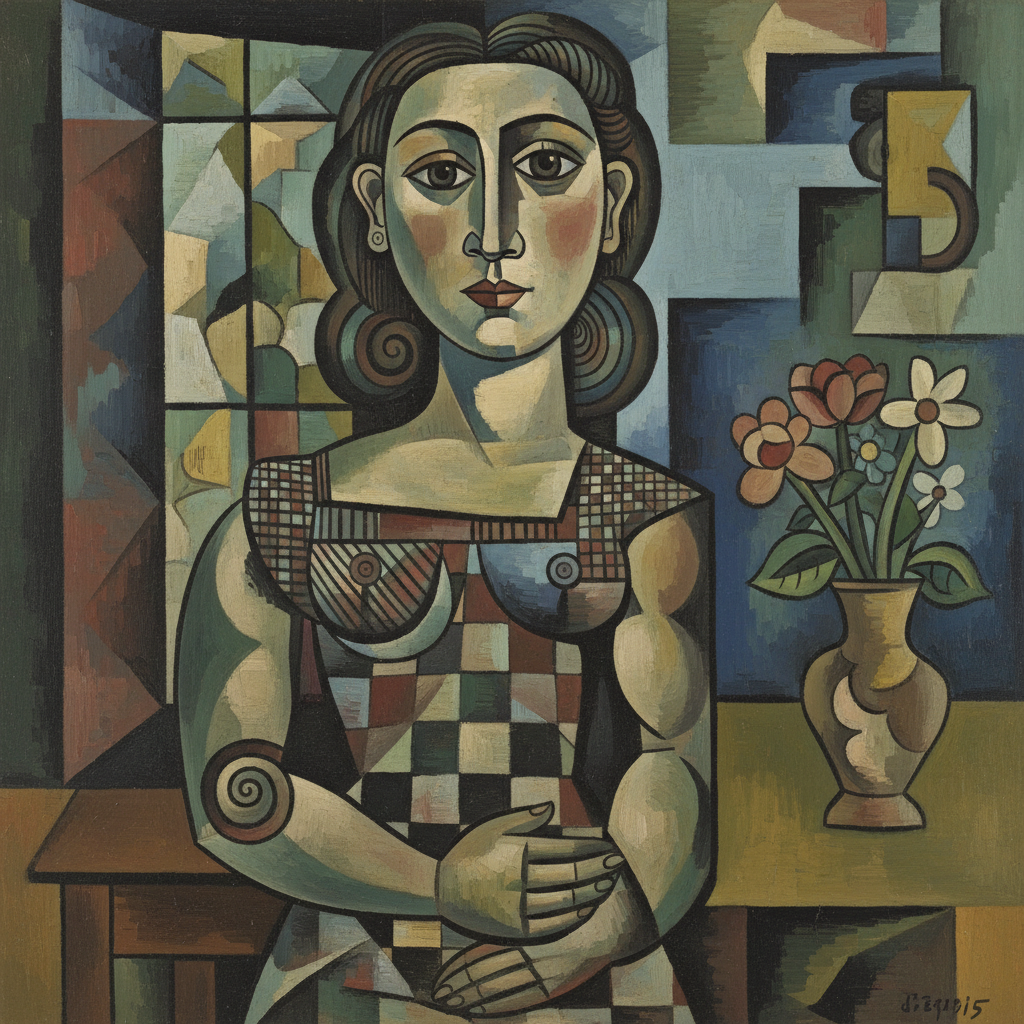
in the style of Picasso | Cubism, geometric decomposition of shapes |
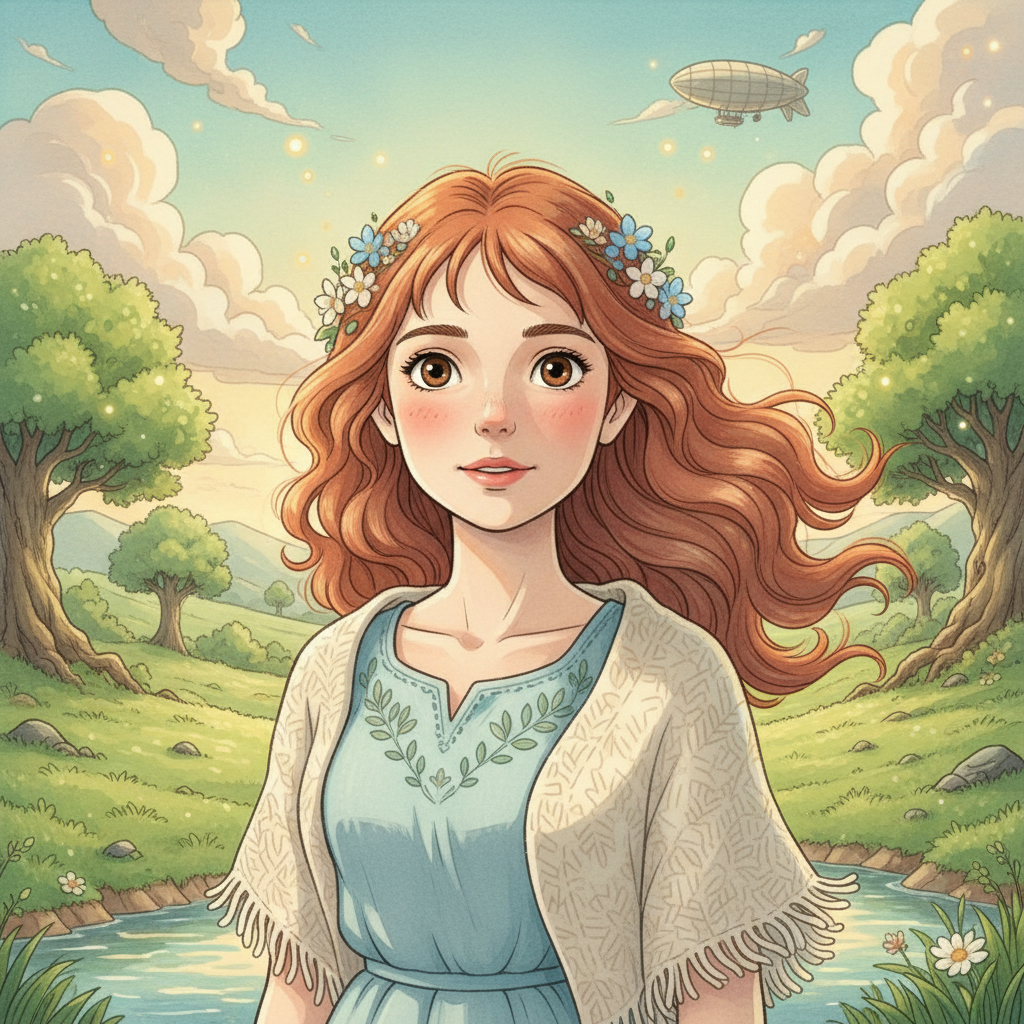
in the style of Studio Ghibli | Soft Japanese animation, lush nature |
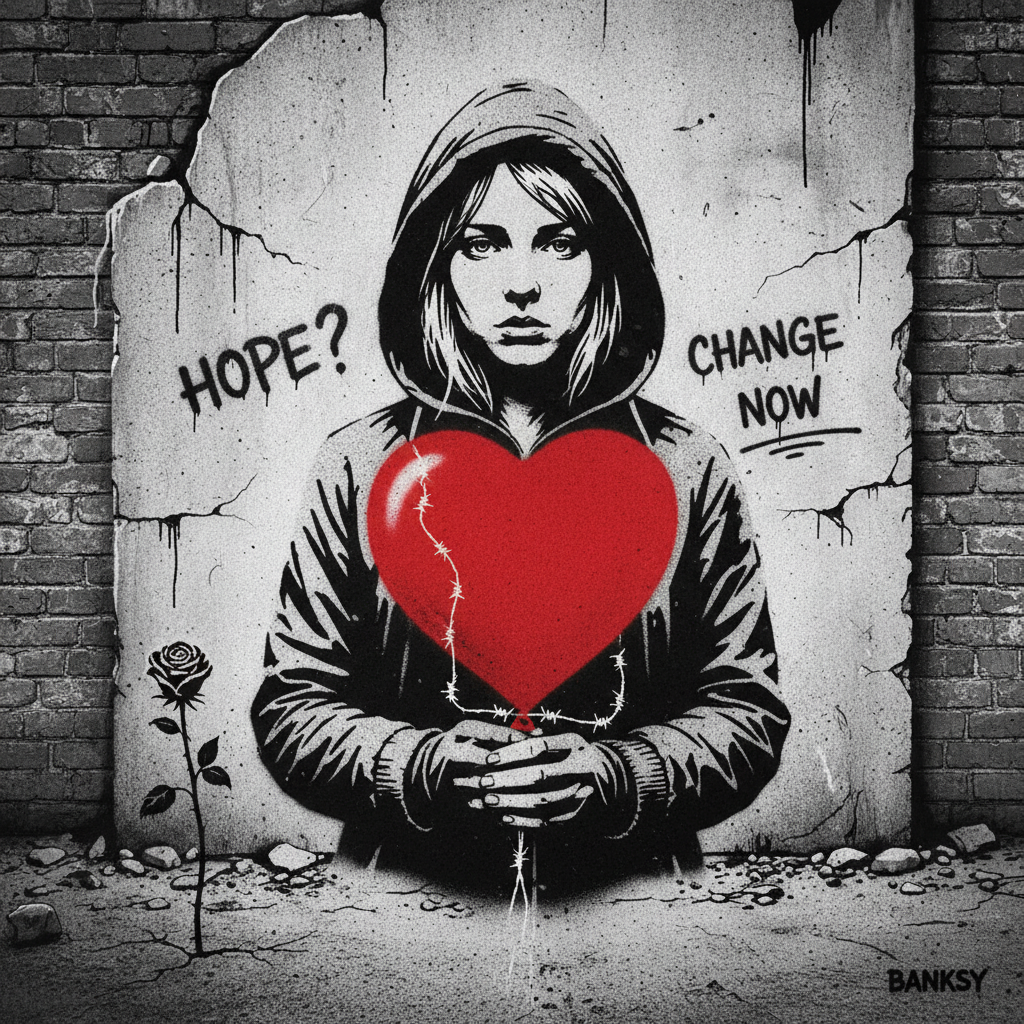
in the style of Banksy | Street art, stencil, social commentary |
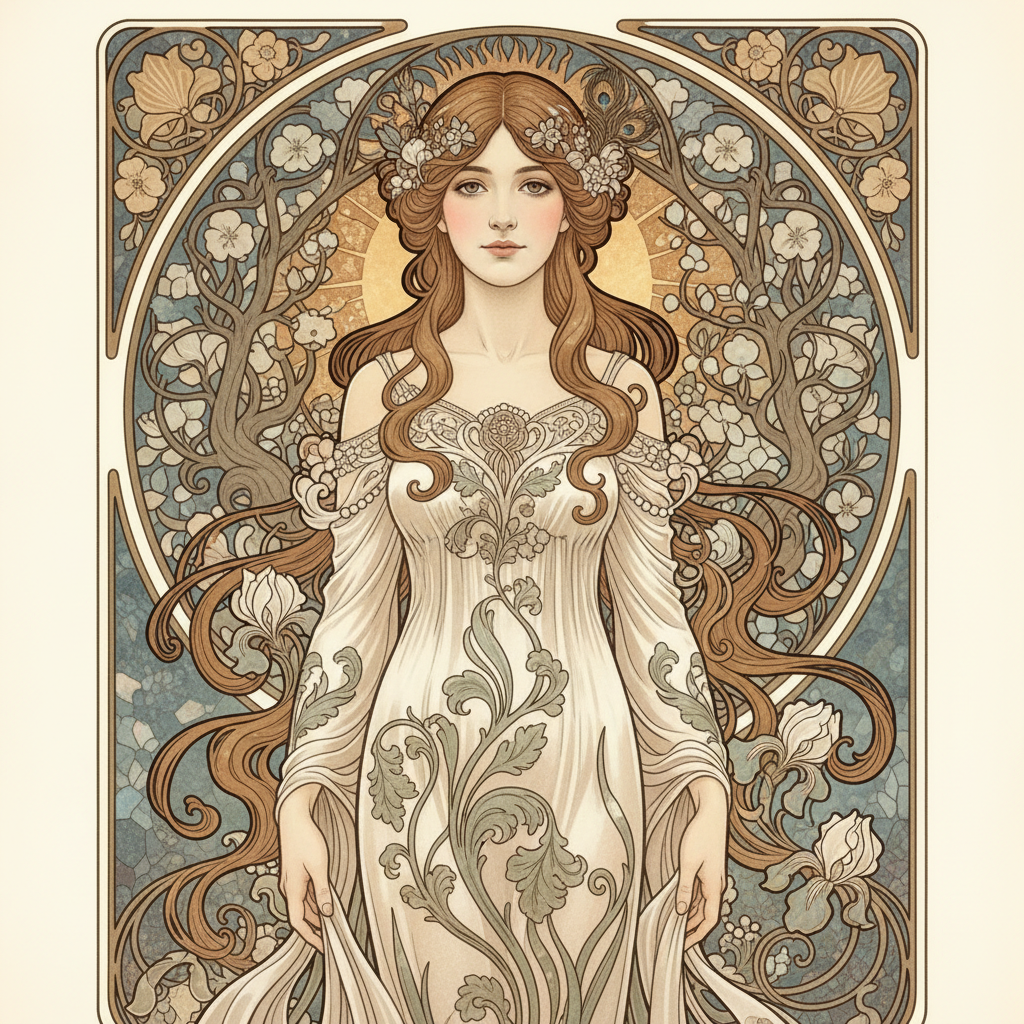
art nouveau style | Vegetal ornaments, curved lines, pastel palette |
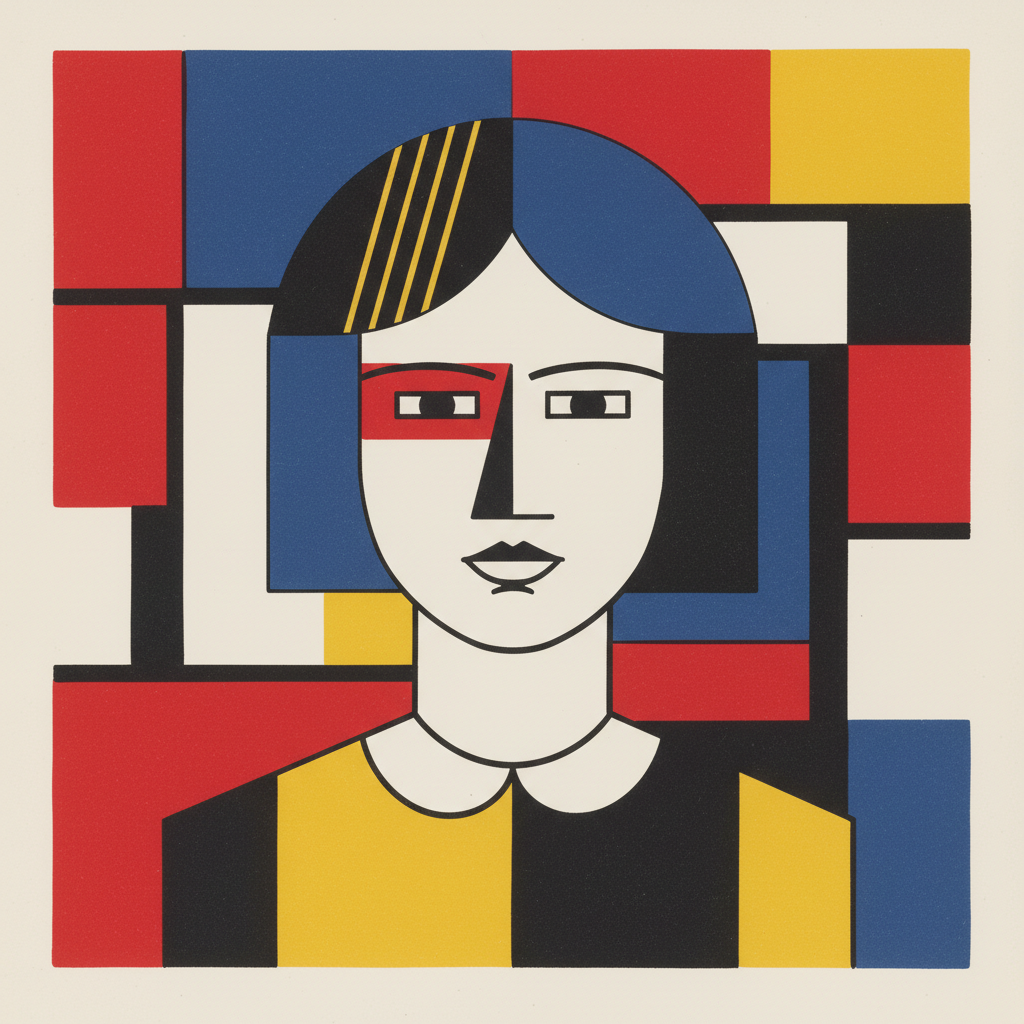
bauhaus style | Pure geometry, primary colors, minimalism |
2. By genre or medium
oil painting, watercolor, pencil sketch, digital art, flat design illustration, 3D render, pixel art, photography
3. By combination
3D render in the style of Pixar, illustration in the style of Studio Ghibli, photo in the style of Wes Anderson
4. By photo or cinematic equipment
For images with a photographic style, you can reference real equipment:
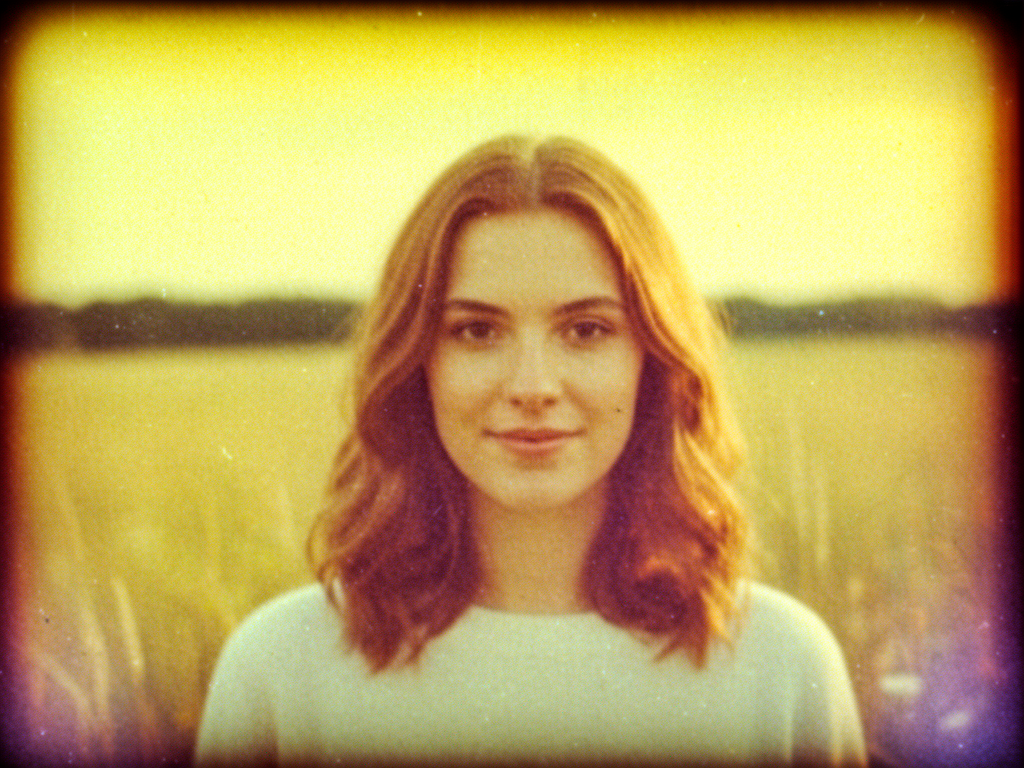
shot on Kodak Portra 400— warm colors, film grainshot on iPhone 15— modern natural rendering80s vintage photo— nostalgia, faded colorsPolaroid style— instant photography, white borders
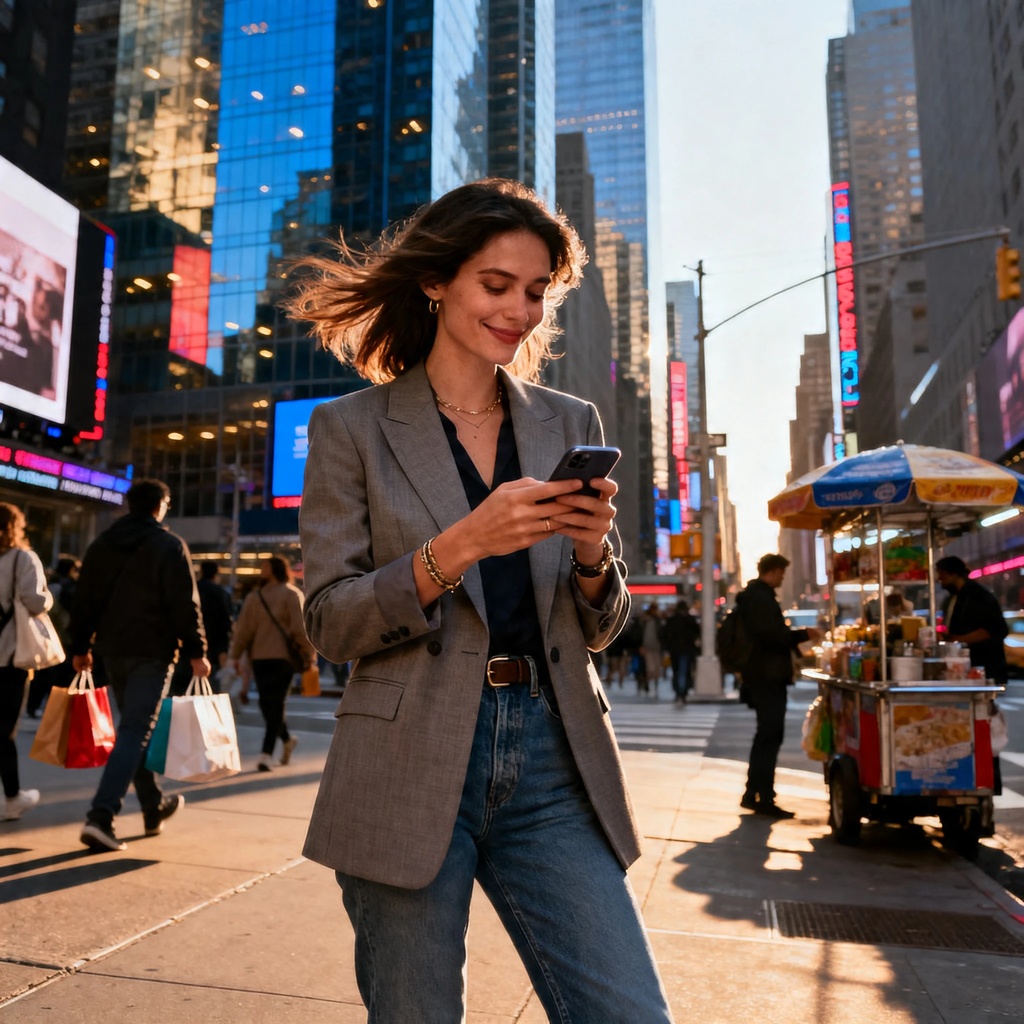
The style shortcut: give a reference image
The most powerful method is often to give an existing image as a style reference. On Haloon, you can upload an image and ask: "Generate [subject] in the same graphic style as this image." The AI extracts the visual characteristics and reproduces them. No need to be an expert in artistic vocabulary.
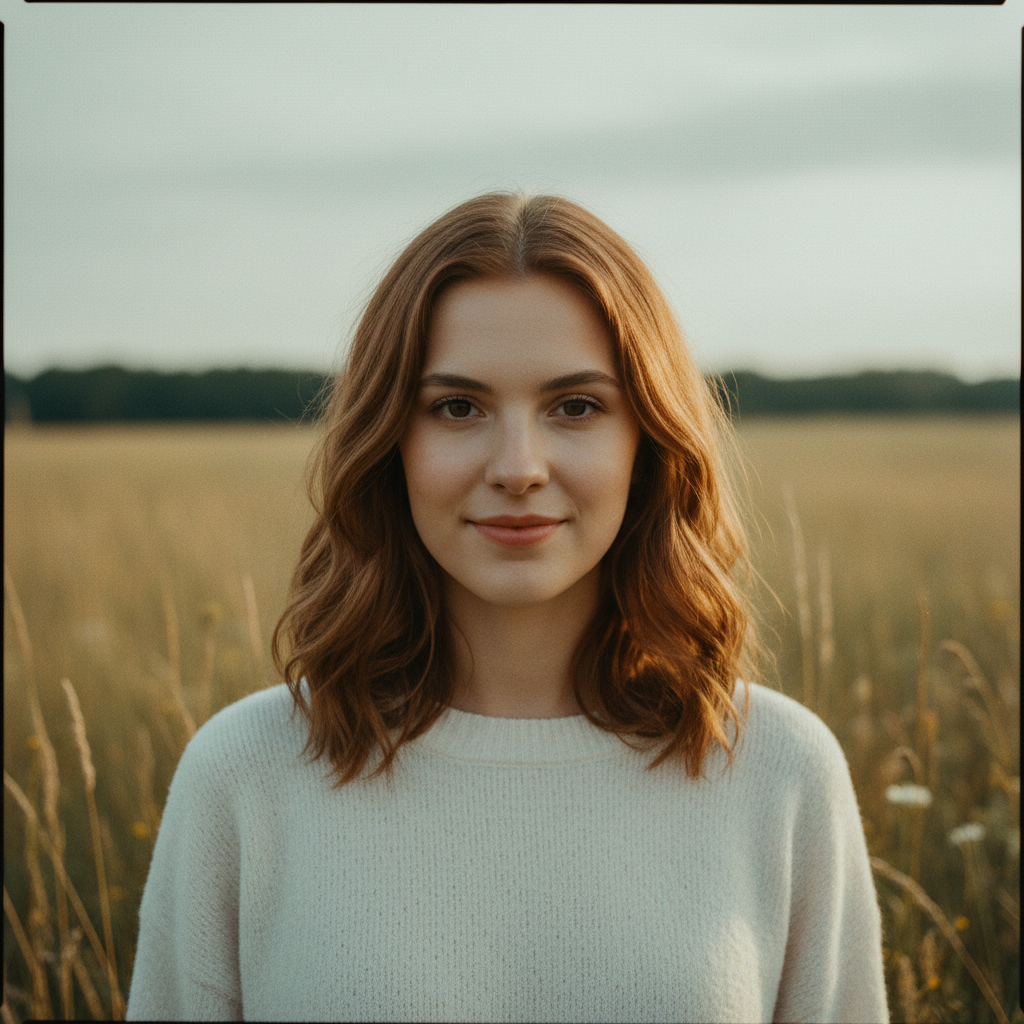
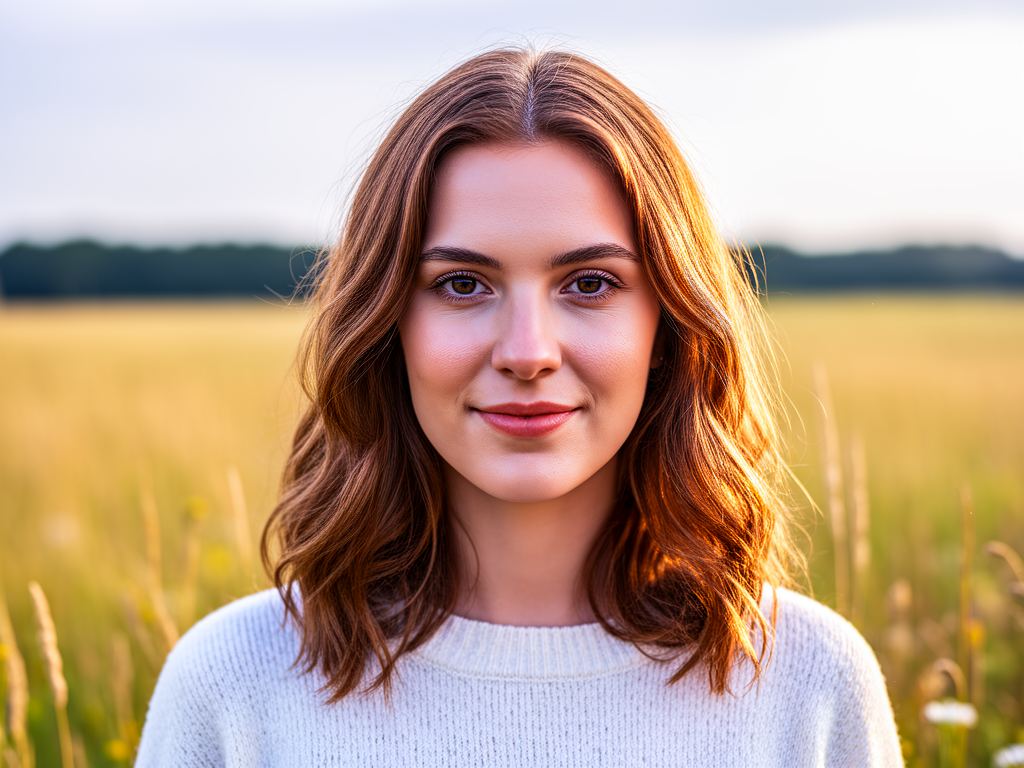
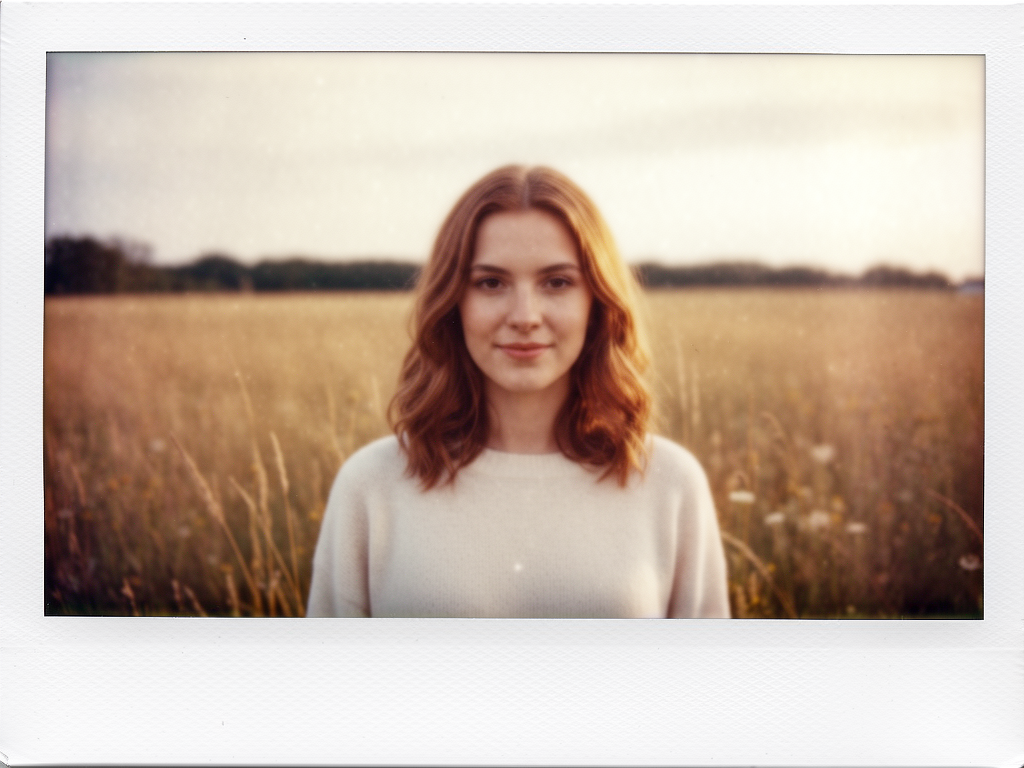
Here, we generated the first image with Generate a front facing young woman shot on Kodak Portra 400 and then used a prompt + the base image to generate the variations. For example, for the iPhone version, update this picture as it has been shot by an iPhone 15.
Quality and Rendering
Going from average to professional results
The quality of a generated image depends on several parameters you can explicitly control in your prompt. Here are the most important levers:
Image type:
Clearly define what you want: photograph, product mockup, logo, icon, sticker, illustration for a book, hero image for a website. This precision avoids model ambiguity.
Technical quality:
These terms "boost" the general quality rendered by most models:
ultra realistic— high-quality photorealistic rendering8k resolutionorhigh resolution— maximum level of detailsharp focus— perfect sharpnesshighly detailed— rich textures and details
Lighting:
Lighting may be the most transformative parameter. The same scene with two different lightings can go from ordinary to cinematic.
| Lighting | Effect |
|---|---|
golden hour lighting | Warm golden light, sunset atmosphere |
cinematic lighting | Dramatic contrast, film-like atmosphere |
soft studio lighting | Professional portrait, soft and flattering |
dramatic side lighting | Strong shadows, visual tension |
neon lighting | Cyberpunk atmosphere, saturated colors |
natural daylight | Neutral, natural and realistic light |
Format and ratio:
Always specify the ratio based on your use case:
16:9— landscape, wallpaper, banner1:1— square, social media post9:16— vertical, stories, mobile4:3— traditional, presentation
Composition
Frame like a photographer or filmmaker
Composition is how elements are organized within the frame. It determines what the viewer sees first, the overall atmosphere, and the sense of depth. AI models respond very well to technical photography and cinema terms.
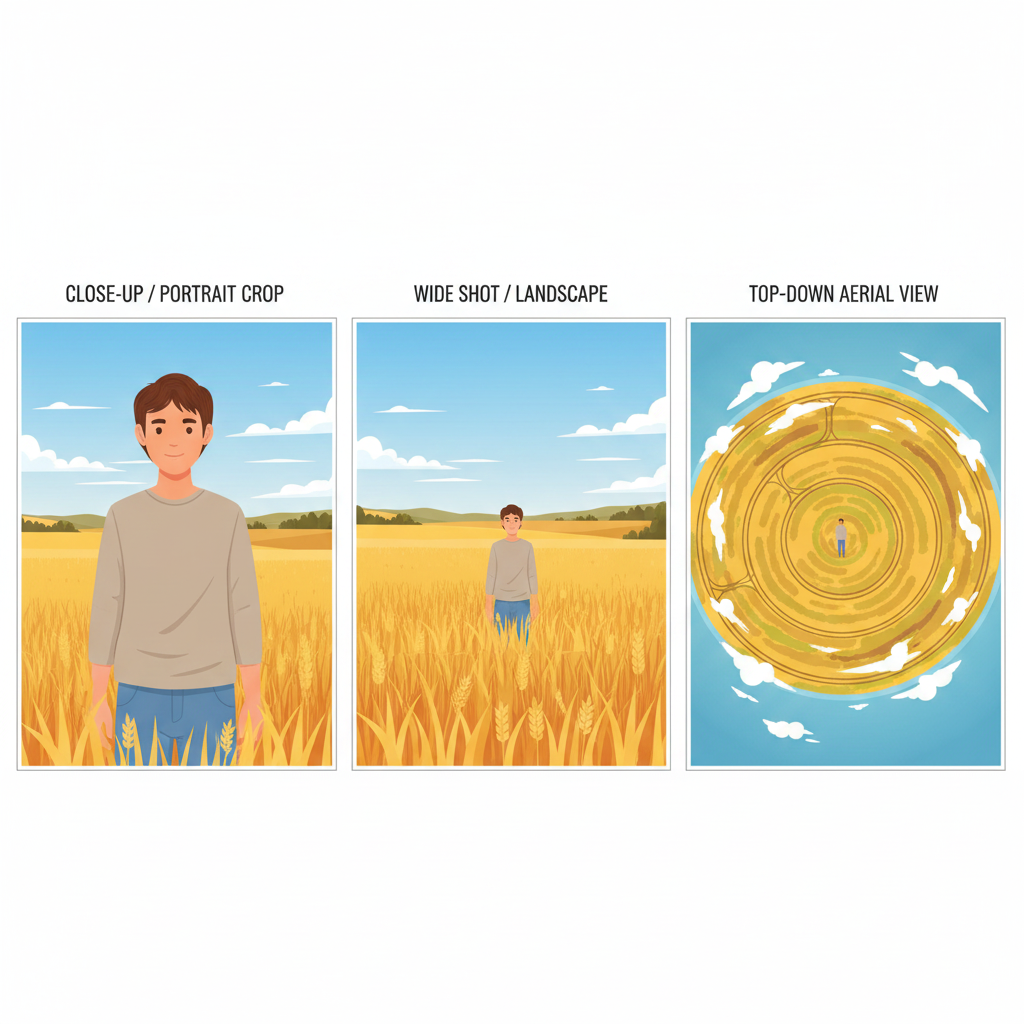
Camera angles:
| Term | Effect |
|---|---|
close-up / extreme close-up | Focus on details, expression, texture |
medium shot | Balance between subject and environment |
wide shot | Context setting, panorama |
top-down / bird's eye view | Aerial view, planning perspective |
low angle | Dominance, power, heroism |
eye level | Natural, accessible |
Lenses and optics:
| Lens | Visual effect |
|---|---|
50mm lens | Most natural, closest to the human eye |
85mm portrait lens | Soft, bokeh, ideal for portraits |
macro lens | Extreme detail, miniature world |
fisheye lens | Dramatic distortion, ultra wide angle |
telephoto 200mm | Depth compression, distant subjects |
Framing and depth of field:
rule of thirds— this rule allows for a dynamic, balanced compositioncentered composition— symmetry, frontal impactshallow depth of field— blurred background, sharp subjectdeep depth of field— everything sharp from foreground to backgroundbokeh background— background lights transformed into soft glowing circles
Combine multiple terms
85mm portrait lens, shallow depth of field, bokeh background, rule of thirds — this combination alone turns any portrait into a professional photograph.
The Text Problem
The exception that proves the rule
Adding text to an AI-generated image is still one of the most difficult tasks today. Even the best models — GPT-Image, Nano Banana, Flux — can produce distorted letters, misspelled words, or inconsistent fonts.
Tips to maximize your chances:
When you need text in an image, be as precise as possible:
The word "HALOON" in bold white sans-serif font, centered at the top of the image, clean and sharp
Specify:
- The exact text (in quotes)
- The font if important (
sans-serif,serif,handwritten) - The relative size (
large,small,headline) - The color (
white,#FF5500,black) - The position (
centered at the top,bottom left corner)
Current model limitations
Even with all these specifications, text may still be imperfect. This is a known limitation of current image generation models.
The professional solution: generate without text, add it afterwards
The most reliable method remains generating your image without text, then adding it in an external tool :
- Canva — the most accessible
- Figma — ideal for designers
- Photoshop / GIMP — full control
This approach guarantees perfect text and lets you adjust it easily without regenerating the entire image.
Iteration for Pro Results
Nobody gets it right the first time
The idea that you'll type a prompt and get exactly what you want on the first try is a myth. Professionals who use generative AI daily — designers, illustrators, content creators — all follow the same process:
- Base prompt: set the main subject and style, without overloading
- Evaluate: identify what works and what needs to change
- Targeted adjustment: change one element at a time
- Iterate: repeat until you reach the desired result
The targeted adjustment rule
Only change one element at a time when iterating. If you modify the style, composition AND lighting simultaneously, you won't know what produced the improvement — and you risk losing what was working.
How to refine an existing image:
When you edit a prompt to refine an image, the magic formula is:
State what you're keeping AND what you're changing.
| Situation | ❌ Vague adjustment | ✅ Precise adjustment |
|---|---|---|
| Change character | make it a girl | Keep the same scene and style, replace the male character with a young woman in her 20s, same clothing and pose |
| Change weather | change the sky | Keep the composition and style, change the sky from clear blue to dramatic stormy clouds with lightning |
| Adjust atmosphere | make it more dramatic | Keep the subject and composition, change the lighting to cinematic dramatic side lighting with stronger shadows |
Tips to Move Fast
Shortcuts used by advanced users
Tip 1 — Ask an LLM to write your prompt
This is the most powerful technique for beginners. Simply describe your image idea in plain language to ChatGPT or Claude, and ask it to write an optimized prompt for your image generator:
"Here's my image idea: [simple description]. Write me an optimized prompt for Nano Banana, including artistic style, quality, composition and lighting."
Tip 2 — Reverse engineer an existing image
Got an image you love and want to reproduce its style? Upload it to a multimodal LLM (Claude, GPT-4o) and ask:
"Describe the graphic style of this image in technical terms usable as a prompt for an image generator."
You'll get a precise description of the style — color palette, artistic references, lighting treatment — that you can reuse directly.
Tip 3 — Optimize your prompt effortlessly
If you have a prompt that gives an acceptable result but not yet excellent:
"Rewrite this prompt to make it more cinematic and detailed, while keeping the same subject: [your current prompt]"
Tip 4 — The universal template
Keep this template handy and fill in the blanks:
[SUBJECT], [SUBJECT DETAILS], [CONTEXT/LOCATION], [TIME/WEATHER],
[ARTISTIC STYLE], [LIGHTING], [LENS/ANGLE], [QUALITY],
[RATIO if needed]
Filled example:
Portrait of an elderly craftsman, focused expression, hands working with wood, small artisan workshop, warm afternoon light through a window, cinematic photography style, golden hour lighting, 85mm portrait lens, shallow depth of field, ultra realistic, 8k
Use Haloon to access all models
On Haloon, you get access to all the best image generation models from a single interface — GPT-Image, Flux, and more. You can compare results on the same prompt in a few clicks, and find the model that best matches your visual style.
Going Further
Advanced parameters that make a difference
Negative prompts
On some models (Stable Diffusion, some Flux versions), you can specify what you do not want in the image:
Negative prompt:
blurry, low quality, distorted, watermark, text, cropped, extra limbs, bad anatomy
Check compatibility
Negative prompts are not supported by all models. GPT-Image, for example, doesn't support them natively. Always check the documentation of the model you're using.
Optimal prompt length
| Length | Words | Recommended use |
|---|---|---|
| Short | 10-30 words | Quick exploration of a concept or style |
| Medium | 30-80 words | Ideal for most projects |
| Long | 80+ words | Complex scenes with precise constraints |
Beyond 100 words, you risk internal contradictions or the model "forgetting" elements. Density matters more than length.
Model-specific parameters
Some models accept technical parameters outside of the text prompt:
- Flux: support for hexadecimal color codes (
#FF5500) for precise color control - Midjourney:
--ar(ratio),--stylize,--chaosparameters - Stable Diffusion: guidance scale, steps, seed for reproducibility
Summary
Generating beautiful images with AI is not a matter of luck — it's a skill that can be learned and practiced.
| Pillar | The golden rule |
|---|---|
| Structure | Everything not written is invented by the model |
| Style | Reference artists, movements, or materials |
| Quality | Lighting transforms an ordinary image into a pro one |
| Composition | Use photo/cinema vocabulary |
| Text | Add it afterwards in Canva or Figma |
| Iteration | One element at a time, state what stays and what changes |
| Tips | Ask an LLM to write or optimize your prompts |
The best way to improve: practice. Take a simple subject, apply one technique at a time, and observe how each addition transforms the result.
Try it now
Test these techniques on Haloon.ai — access to GPT-Image, Flux and other image generation models from a single interface, without juggling multiple subscriptions.